Yearbook starts with great photography. The pictures are what pull the viewer in to admire the great design, read the captions, and the copy. Improving your publication’s photography is not only about taking great photos it is also about choosing those photos to be included in your yearbook.
Ask yourself, what makes a photograph memorable to you? Is it the subject matter, the lighting, the colours, the composition, the emotion, or moment? If you can start identifying these characteristics you can better choose the pictures to be included in your book.
To improve the quality of images in your yearbook, have the entire yearbook staff evaluate last year’s book, look at the pictures and decide what is the one thing that you could do better regarding the photography. Make a list but only choose one, you can’t correct everything all at once. Get good at that one item and then move on to another. Remind both the photographers and the designers of that goal.
For example
• Pictures in focus
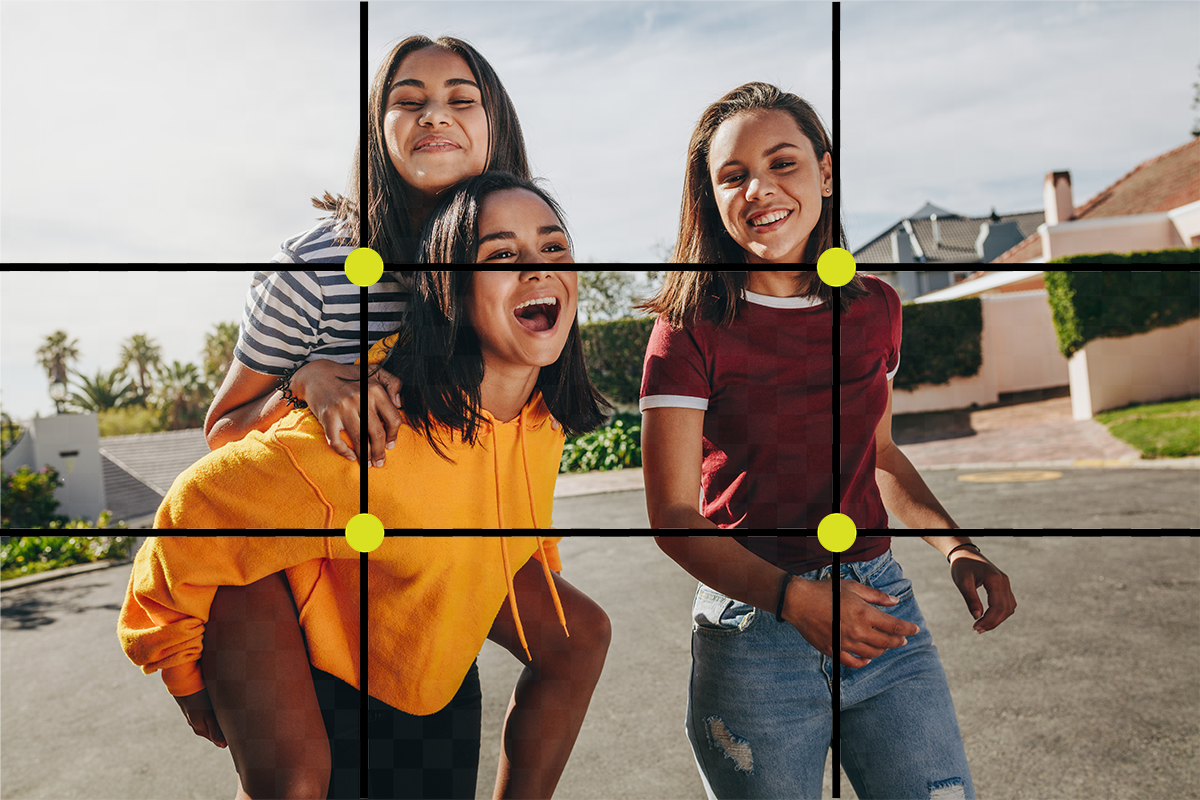
• Images that follow good composition, rule of thirds, framing, lines, simplicity
• Showing people’s faces instead of the side or back
• Capturing connections or interactions
• We tend to have action shots covered but what about reaction moments?
• Good technical quality – understanding exposure, contrast, colour
• Telling a story with your picture
• Engage the interests of the viewer
• Better cropping of the image, get rid of the extra stuff, focusing on the subject
• Avoiding distracting backgrounds
• Better lighting
• Distance from the subject being photographed, get closer

- Having 3 subjects in a photograph does a better job of filling the frame, telling the story and being a stronger composition than having 1 or 2 people. Think about all the people you could include or cover in your yearbook
if your goal were to have 3 people in every photo.- If you are including photographs with only one person, they need to be doing something interesting or amazing to capture the reader’s attention.
- Capture interesting moments and not just static poses. Look for photographs that evoke emotion or a reaction from the viewer. Subjects do not need to be looking directly at the camera.
- To capture moments, train your students and staff to ignore the camera. Do this by always having a camera present. This can be a phone if necessary. Take so many pictures that you start to fade into the background
when moments or events are happening.- Reposition yourself to capture people’s faces. Figure out where you need to be and where your camera needs to be positioned to capture their face. If they are low, get low. Get out into the action if possible. Get your camera in close. Show the viewer a vantage point they may not get to see otherwise.
- Learn how to control depth of field and use that to tell your story. Use a shallow depth of field to focus on a subject, blur out a distracting background, or use a deep depth of field to have a group of people in focus.
- In a crowd or group shot, look for an ‘entry point’ for your viewer. Using an entry point draws the viewer’s eyes and then they can explore the rest of the photograph.
Different entry points can include
• one person turned towards the camera
• focusing on one subject, and slightly blurring the rest of the crowd
• having the main subject doing something different than the rest
• use cropping to make the primary subject stand out
• move in close and make the primary subject larger than the rest- Place or frame subjects using the rule of thirds intersecting points. By following this you contribute to your composition, but you also help the viewer identify the main subject of your photograph.
- Think about foreground, middle ground, and the background of your picture. By doing this you create more of a 3-dimensional image even though the viewer is looking at a 2-dimensional picture.
- Take lots of photos but mix up the settings, the light, the angle, the orientation, etc., so that when you get to the editing process you will have lots of selection to tell the story.
- Get to the event early and stay after it is over. Get the complete story. Capture the moments before and the reactions after. Capture both the happy and the not-so-happy moments. As a journalist it is important for you to tell the story.
- Look at great photography to get inspiration.
• https://atpi.smugmug.com/
• https://jeaphoto.smugmug.com/
That is a loooong list of tips but start by incorporating a few at a time.